This article explains how to set up a Java formatter in Visual Studio Code based on Google Java Style.
Prerequisites
- The extension Java Extension Pack must be installed.
How to Set Up
1. Prepare the formatter file
You can obtain the Google Java Style formatter from https://raw.githubusercontent.com/google/styleguide/gh-pages/eclipse-java-google-style.xml.
You will configure this formatter in the following steps, so there is no need to download the file now.
2. Change VSCode settings
Open the VSCode settings either through the GUI or by editing the settings.json file.
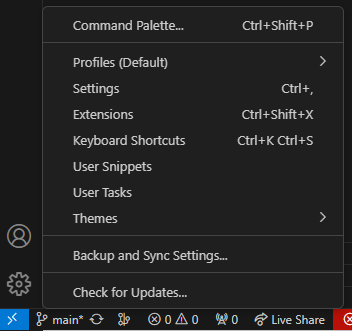
- GUI: Click the gear icon on the VSCode activity bar and select “Settings”.

- Edit
settings.json: Go to the VSCode menu bar, click “View” > “Command Palette”, and type “Open User Settings (JSON)”.

2.1. Apply the formatter file in java.format.settings.url

{
  // ... Omitted ...

  "java.format.settings.url": "https://raw.githubusercontent.com/google/styleguide/gh-pages/eclipse-java-google-style.xml",
}
In java.format.settings.url, you can set either the URL of the formatter or the file path to the formatter on your local machine. Here, we set the URL of the previously mentioned formatter.
2.2. Apply the formatter profile name in java.format.settings.profile

{
  // ... Omitted ...

  "java.format.settings.profile": "GoogleStyle",
}
You can set the formatter profile name in java.format.settings.profile. This is required if the formatter file contains multiple profile names.
Although the formatter from the aforementioned URL only contains one profile name, I’ve set it just in case.
3. Complete the setup
The configuration is now complete! Let’s open a Java file and format it.

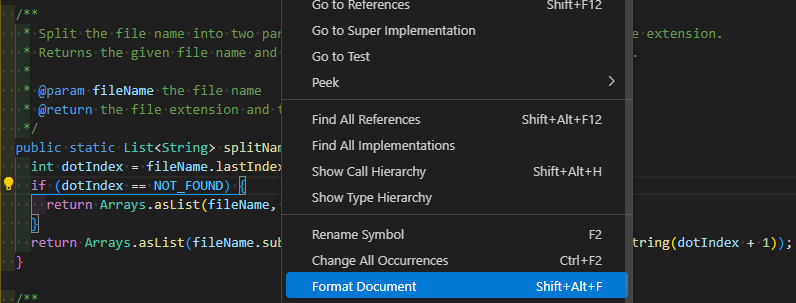
Right-click within the file and select “Format Document.” The code in the Java file will then be formatted according to the Google Java Style.
Customizing Settings
In the following section, I will explain how to change the formatter settings and adjust VSCode settings.
1. Customize the formatter file
1.1. Create a formatter file on your PC
Since the Google Java Style formatter file is available online, you won’t be able to directly edit its content.
To customize it, copy the contents of https://raw.githubusercontent.com/google/styleguide/gh-pages/eclipse-java-google-style.xml and create a formatter file on your local machine.
In this example, I name the formatter file “eclipse-java-google-style.xml”, but feel free to use any name you prefer.

1.2. Change the formatter settings values
Google Java Style is a great formatter, but there may be times when you want to modify some of its settings.
For example, when formatting code that uses the Builder class, it might look like this:
public class MyClass {
  public static void main(String[] args) {
    User user = new User.Builder().setId("00000001").setName("user").setUserPrincipalName("user")
        .setMail("user@sample.com").setLocation("Japan").build();

    System.out.println(user);
  }
}
In its current state, the code may be a bit hard to read. Let’s try changing some configuration values in the formatter file.
<setting id="org.eclipse.jdt.core.formatter.join_wrapped_lines" value="false"/>By setting org.eclipse.jdt.core.formatter.join_wrapped_lines to false, the formatter will retain line breaks instead of removing them.
Now, let’s insert a newline between the setXxxx methods in the previously mentioned Builder class and then format the code. The result will look like this:
public class MyClass {
  public static void main(String[] args) {
    User user = new User.Builder()
        .setId("00000001")
        .setName("user")
        .setUserPrincipalName("user")
        .setMail("user@sample.com")
        .setLocation("Japan")
        .build();

    System.out.println(user);
  }
}
As you can see, the manually inserted line breaks are preserved.
2. Customize VSCode settings
2.1. Update java.format.settings.url
Change the value of java.format.settings.url from the URL to the file path of the formatter file you just created.

{
  // ... Omitted ...

  // "java.format.settings.url": "https://raw.githubusercontent.com/google/styleguide/gh-pages/eclipse-java-google-style.xml",
  "java.format.settings.url": "eclipse-java-google-style.xml"
}
2.2. Enable the automatic formatting feature
Manually formatting can be a hassle, so it’s helpful to set up automatic formatting.
Open settings.json using the method described above and add the following:
{
  // ... Omitted ...

  "[java]": {
    "editor.formatOnSave": true,
  },
}
By setting editor.formatOnSave to true, the Java file will be automatically formatted each time you save it.
It is also recommended to enable editor.formatOnPaste (automatic formatting when pasting code) and editor.formatOnType (automatic formatting while typing code).
In the end, your settings.json should look like this:
{
  // ... Omitted ...

  "java.format.settings.profile": "GoogleStyle",
  "java.format.settings.url": "eclipse-java-google-style.xml",
  "[java]": {
    "editor.formatOnPaste": true,
    "editor.formatOnSave": true,
    "editor.formatOnType": true,
  },
}
References

Notes
- This article uses Google Java Style as an example, but if you want to apply a different code style, please provide the corresponding formatter file.
- The default value of
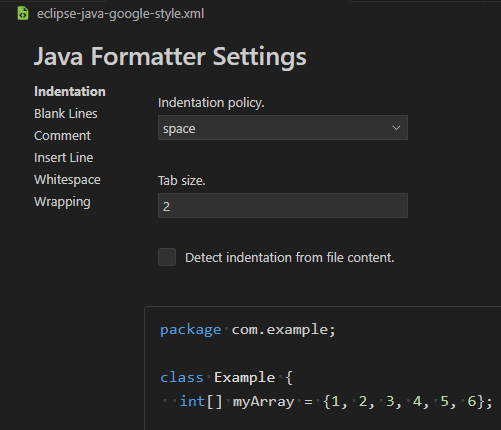
java.format.settings.urlis empty. If left empty, VSCode will use the.settings/org.eclipse.jdt.core.prefsfile from the workspace that is currently open as the formatter. For example, iforg.eclipse.jdt.core.formatter.join_wrapped_lines=trueis specified in this file, newlines will be preserved during formatting. - You can either edit the contents of the formatter file directly or open a dedicated editing window. To do this, click “View” > “Command Palette” in the VSCode menu bar and type “Open Java Formatter Settings with Preview.”

Comments